Maintenance Tips for Solar-Powered Security Cameras
In Australia, solar-powered security cameras have gained significant popularity due to their eco-friendliness and cost-effectiveness. These devices harness solar energy to operate, reducing electricity costs and minimizing environmental impact. However, to ensure optimal performance and longevity, regular maintenance is crucial. In this guide, we'll explore practical tips for maintaining your solar-powered security cameras, ensuring they continue to provide reliable surveillance for your property.
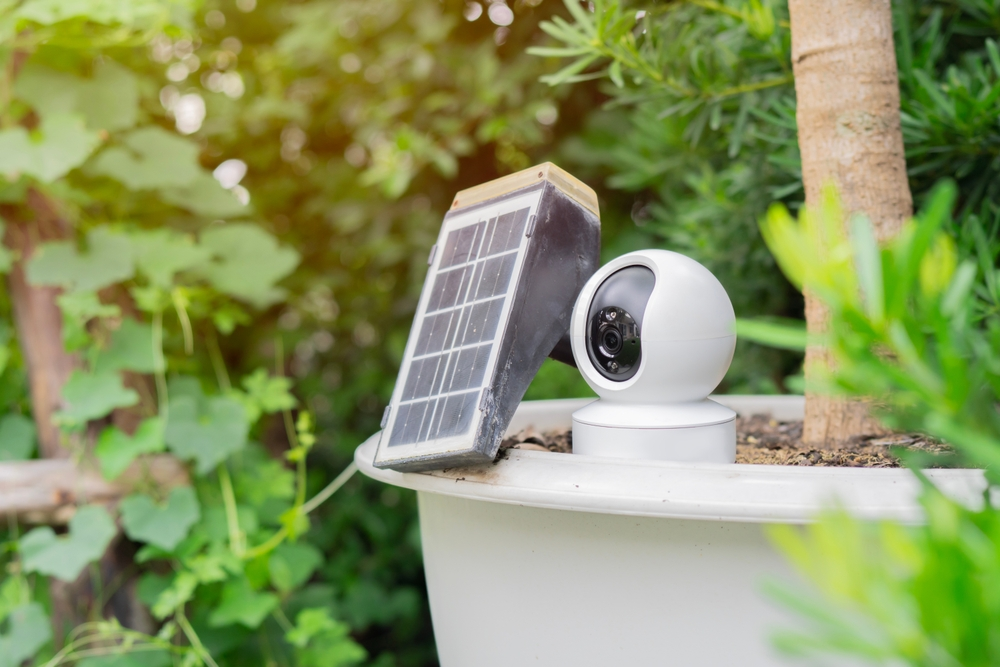
Choosing the Right Installation Location
Selecting the optimal installation location for your solar-powered security camera is crucial to ensure its effectiveness and longevity. Here are key considerations to guide your decision:
1. Maximize Sunlight Exposure: To ensure your solar-powered security camera operates efficiently, place it in an area that receives ample direct sunlight throughout the day. This will allow the solar panel to charge the battery effectively, ensuring continuous operation even during cloudy days or at night.
2. Avoid Obstructions: Ensure that the camera and its solar panel are free from obstructions such as trees, buildings, or other structures that could cast shadows and reduce sunlight exposure. Regularly trim any vegetation that may grow and block sunlight from reaching the solar panel.
3. Consider the Camera's Field of View: Position the camera to cover the desired surveillance area without obstructions. Take into account the camera's field of view and ensure it captures the intended area effectively.
4. Account for Seasonal Variations: Keep in mind that the angle and duration of sunlight exposure can vary with the seasons. During winter months, the sun's position in the sky changes, which may affect the amount of sunlight your solar panel receives. Position your camera to account for these seasonal changes to maintain optimal performance year-round.
5. Ensure Accessibility for Maintenance: Choose a location that allows easy access for regular maintenance tasks, such as cleaning the solar panel and checking the camera's functionality. This will help maintain the camera's efficiency and prolong its lifespan.
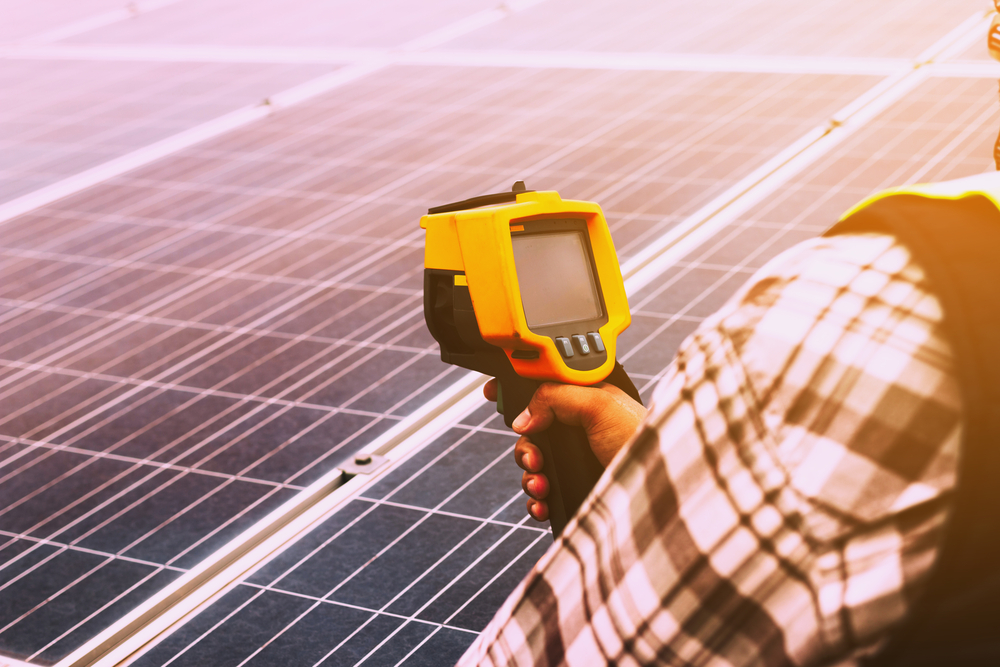
Regular Cleaning of Solar Panels
Maintaining the cleanliness of your solar panels is essential for ensuring their optimal performance and longevity. Accumulation of dust, dirt, pollen, and other debris - collectively referred to as "soiling" - can significantly reduce the efficiency of solar panels. In regions with high dust or pollen levels, dirty panels can experience a decrease in power output by up to 30%.
Why Regular Cleaning Matters: Soiling prevents sunlight from reaching the solar cells, thereby diminishing their ability to generate electricity. Over time, this buildup can lead to substantial energy losses. For instance, in areas with minimal rainfall or frequent dust storms, panels may require more frequent cleaning to maintain their efficiency.
Best Practices for Cleaning Solar Panels:
1. Use Soft, Non-Abrasive Materials: When cleaning your panels, opt for soft cloths or brushes to avoid scratching the surface. Avoid using harsh chemicals or abrasive materials that could damage the panels.
2. Clean During Cooler Times of the Day: It's best to clean your panels early in the morning or late in the afternoon when they are cooler. Cleaning hot panels can cause thermal stress and potential damage.
3. Avoid Using Harsh Chemicals: Stick to mild soap solutions and water for cleaning. Harsh chemicals can leave residues that may degrade the panel's surface over time.
Check for Obstructions: Regularly inspect your panels for any obstructions like bird nests or debris that could block sunlight. Removing these promptly ensures uninterrupted performance.
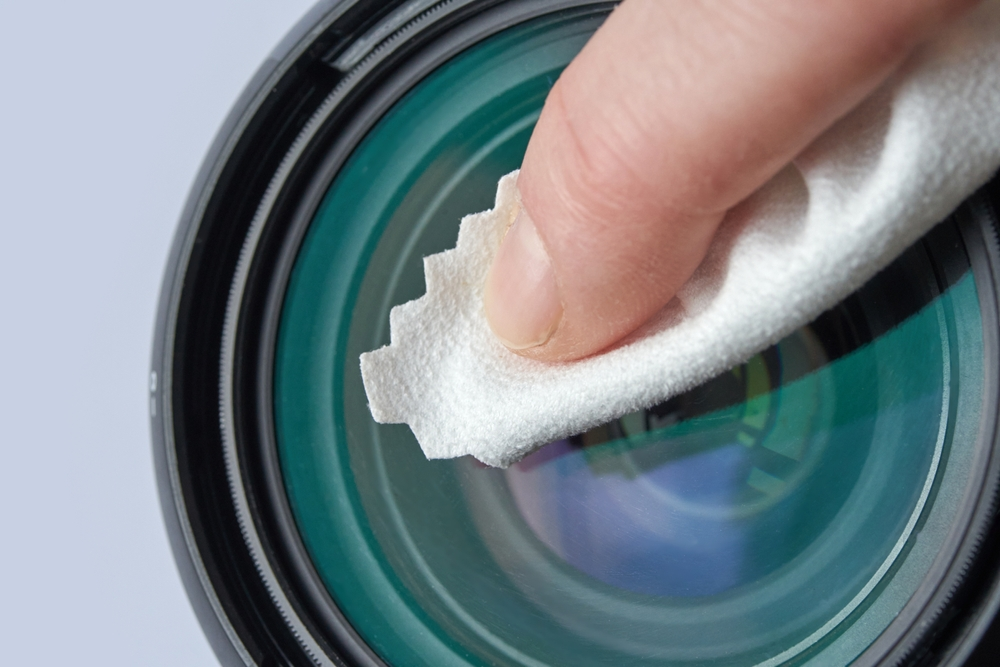
Inspecting and Maintaining Camera Lenses
The lens of your solar-powered security camera plays a pivotal role in capturing clear and detailed footage. Regular inspection and maintenance are essential to ensure optimal image quality and the longevity of your surveillance system.
Why Lens Maintenance Matters: Over time, lenses can accumulate dust, dirt, water spots, or even develop scratches, all of which can degrade image clarity. Insects might build nests, and environmental factors like bird droppings can obstruct the lens, leading to compromised surveillance capabilities.
Steps for Effective Lens Maintenance:
1. Regular Visual Inspections: Periodically examine the lens for any visible obstructions or damage. Look for smudges, cracks, or signs of wear that might affect performance.
2. Gentle Cleaning: Use a soft, lint-free microfiber cloth to gently wipe the lens. Avoid using paper towels or abrasive materials that could scratch the surface. For stubborn spots, lightly dampen the cloth with water or a lens-safe cleaning solution.
3. Addressing Environmental Interference: Check for signs of insect nests or bird activity around the camera. These can obstruct the lens and should be removed promptly. Ensure that the camera's housing is secure to prevent such issues.
4. Protective Measures: Consider installing a protective cover or housing around the camera to shield the lens from environmental elements. This can help reduce the frequency of cleaning and protect against potential damage.
Firmware and Software Updates
Regular updates address vulnerabilities, introduce new features, and improve overall functionality, making them an essential aspect of your camera's maintenance routine.
How to Update Your Solar-Powered Security Camera:
1. Automatic Updates: Many modern security cameras are designed to receive automatic firmware updates. Ensure that your camera is connected to a stable internet connection and that automatic updates are enabled in the device settings. This allows the camera to receive and install updates without manual intervention.
2. Manual Updates: If your camera does not support automatic updates, you can manually update the firmware. Visit the manufacturer's official website to download the latest firmware version compatible with your camera model. Follow the provided instructions to upload and install the update through the camera's web interface or mobile application.
3. Mobile App Updates: For cameras controlled via a mobile app, ensure that the app is updated to the latest version. App updates often include improvements to the camera's functionality and may prompt you to update the camera's firmware when necessary.
Best Practices for Managing Firmware Updates
- Regularly Check for Updates: Even if your camera supports automatic updates, it's a good practice to periodically check for updates manually to ensure you haven't missed any critical patches.
- Read Release Notes: Before installing an update, review the release notes provided by the manufacturer. These notes detail the changes, improvements, and fixes included in the update, helping you understand its impact on your device.
- Backup Settings: Some firmware updates may reset your camera to factory settings. Before updating, back up your current settings to avoid reconfiguring the camera after the update.
Schedule Updates: If your camera is actively monitoring during certain hours, schedule updates during off-peak times to minimize disruption to surveillance activities.
Checking Mounts and Physical Security
Over time, environmental factors and wear can compromise the stability and effectiveness of your camera system. Here's how to ensure your mounts and physical setup remain secure:
1. Regularly Inspect Mounting Hardware
Begin by checking all screws, bolts, and fasteners that secure your camera to its mount. Over time, these can loosen due to vibrations, wind, or thermal expansion and contraction. Tighten any loose components to prevent the camera from shifting or falling.
2. Examine Mounts for Wear and Tear
Inspect the mounts themselves for signs of wear, corrosion, or damage. Exposure to the elements can degrade materials, especially in coastal areas where saltwater can accelerate corrosion. If you notice any compromised mounts, replace them promptly to maintain camera stability.
3. Ensure Proper Alignment
Verify that your camera is correctly aligned to cover the desired surveillance area. Misalignment can result from accidental bumps or shifting mounts. Adjust the camera's position as needed to ensure optimal coverage.
4. Secure Cables and Connections
Check that all cables are securely connected and protected from environmental factors. Exposed wires can be vulnerable to damage from animals, weather, or tampering. Use cable clips or conduits to secure and protect wiring.
5. Implement Anti-Theft Measures
In high-risk areas, consider adding anti-theft devices such as tamper-resistant screws or lockable mounts. These can deter unauthorized individuals from tampering with or removing your camera.
6. Protect Against Environmental Factors
Ensure that your camera's housing is intact and provides adequate protection against dust, moisture, and insects. Damaged enclosures can allow debris or pests to interfere with the camera's operation.
7. Regular Maintenance Schedule
Establish a routine maintenance schedule to inspect and maintain your camera mounts and physical setup. Regular checks can help identify and address issues before they affect the camera's performance.
By diligently checking and maintaining your camera mounts and physical setup, you can ensure that your solar-powered security camera continues to provide reliable surveillance, enhancing the security of your property.
Conclusion
Regular maintenance of your solar-powered security camera is essential to ensure its longevity and effectiveness. By following these tips, you can enhance the performance of your security system and maintain reliable surveillance for your property. For expert installation and maintenance services in Australia, consider partnering with Scavi to safeguard your home with advanced security solutions.